
It's never a good idea to ignore a dripping tap. The sooner you tackle it, the easier it'll be to fix - and the less damage will be done. Even if you don't have a spare washer, take a look inside the tap. If the washer is only slightly damaged on one face, you can reinsert it the other way up. But even if that stops the drip, remember to replace it with a new washer as soon as possible.
You can repair standard mixer taps in the way shown here, but monobloc taps (which are often controlled by levers, and need only a quarter-turn between being fully off and fully on) have ceramic disks rather than traditional washers. These disks are very hard-wearing, but if one develops a problem you'll need a replacement cartridge from the tap manufacturer.
Top tip - Choosing the right taps
When you buy new taps, check they're the right type for your system. If you fit high-pressure (mains) taps on a low-pressure, gravity-fed hot water system, it could cause poor water flow, especially in a bath.
Top tip - Valve seating damage
If your tap keeps on dripping even with a new washer, the valve seating has probably eroded. You can repair this with a special grinding tool or (much more easily) with a washer and seating set. The plastic seat fits into the existing metal one, and a washer-and-jumper unit fits on the headgear. The sooner you replace a washer, the less likely the valve seating is to get damaged.
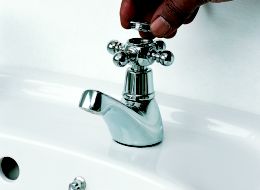
Step 1
Turn off your water supply and open the tap to drain water from the system. Put the plug into the plug-hole, just in case you drop any small nuts or screws. Then unscrew the top plate (this has the hot/cold emblem on it). You might be able to do this with your fingers - but if not, use pliers or an adjustable spanner.
Step 2
Not all taps are made in the same way, so you'll need to work out how the handle comes off. In the type shown, you undo the retaining screw and pull the handle off. This reveals the headgear nut.
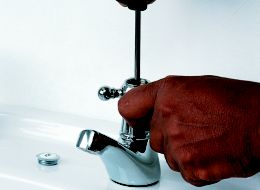
Step 3
Unscrew the tap body cover. If you can't do this by hand, try using an adjustable spanner or pipe wrench - but remember to protect the chrome with a cloth.
Step 4
Undo the headgear nut, using an adjustable spanner. If the nut is difficult to turn, don't force it or you'll risk twisting the base of the tap and putting a strain on the inlet pipe. Instead, pad around the base of the tap with cardboard and use a pipe wrench to grip it firmly as you apply the necessary force to the nut.
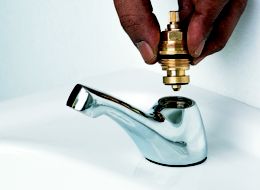
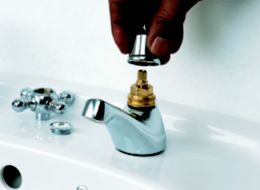
Step 5
Remove the headgear assembly by unscrewing the headgear nut. The washer sits in the jumper, and is either pressed in place (often over a small button) or retained by a nut. If necessary, unscrew the nut that holds the washer in place with an adjustable spanner. Then prise out the old washer, using a screwdriver to dig it out if need be.
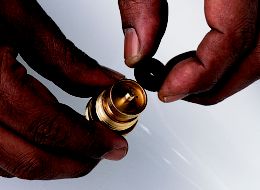
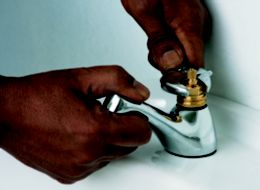
Step 6
Insert a new washer and push it into the jumper, then reassemble the tap in the same sequence. It's a good idea to put a little silicone grease on the threads on the base of the headgear assembly before putting it back in the tap body.
Please visit www.homeekart.com to buy taps, wash basins, bathroom fittings and many more....
bathroom fittings, taps, bathroom accessories, showers, hand showers, health faucets, LED showers online from www.homeekart.com. You get a choice of brands like Jaquar, Hindware, Cera, Marc, Cera, EssEss and many more.
No comments:
Post a Comment